


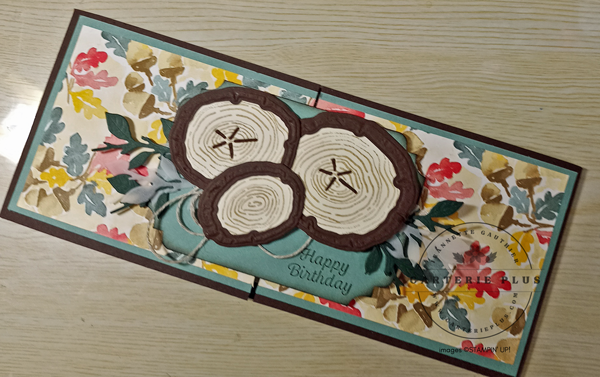
Gatefold Slimline card
Bienvenue à notre NOUVEAU AT SU! Blog hop! Nous sommes un groupe démonstrateurs de Stampin’ Up! du monde entier qui partagent avec vous notre passion de Scrapbooking et la carterie. Aujourd’hui, nous présentent des plis amusants/originale/fantaisie à l’aide de paires du Stampin’ Up de juillet-décembre! Catalogue. Quand je dis paires, je veux dire estampes et découpe (poinçons) et / ou papiers.
Welcome to our NEW AT SU! Blog hop! We are a group of Stampin’ Up! demonstrators from around the world who share our creative paper crafting ideas with you. Today we are showcasing fun folds using pairs from the July-December Stampin’ Up! Catalog. When I say pairs, I mean stamps et dies and/or papers.
Bien sûr, j’ai choisi le bundle Cercle de la nature. Pourquoi, direz-vous. Eh bien, quiconque me connaît sait deux choses sur moi.
- J’aime les plis amusants amusants/originale/fantaisie et je suis toujours à la recherche de plis amusants faciles que je peux partager avec mes clients.
J’ai été inspiré par Jennifer McGuire pour cette carte slimline gatefold.
Of course, I chose the Ringed with nature bundle. Why, you might ask. Well, anyone who knows me knows two things about me.
- I love fun folds and am always looking for easy fun folds I can share with my clients. Of course, sometimes I get one that is a bit more complicated and those I share with my more advanced students.
- Also, I love hybrid dies and embossing folders. With the bundle I have chosen, you can place the dies in the embossing folder and cut and emboss with one pass in the Stampin’ cut and emboss machine.
I was inspired by Jennifer McGuire for this gatefold slimline card.
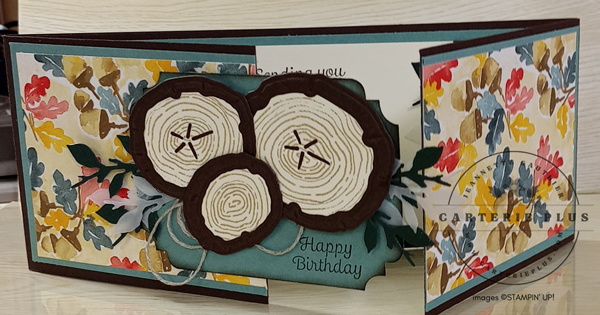
J’ai commencé avec un morceau de carton 8-1/2 x 3-1/2 couleur café. J’ai ajouté un rabat 4-3/4 x 3-1/2, marqué à 1/2 pouce du côté 4-3/4 à chaque pièce et les ai collés à chaque extrémité du papier cartonné 8-1/2 x 3-1/2 formant un pli de porte.
J’ai ensuite ajouté un morceau de carton coordonnant de 1/4 de pouce plus petit et DSP un autre 1/4 de pouce plus petit.
Le point focal est créé avec les cernes des arbres et un morceau de papier cartonné avec le sentiment estampillé dans le coin inférieur droit. J’ai utilisé le nouveau coup de poing de trio pour créer les coins de fantaisie et encré les bords pour le faire pop. L’ajout de la ficelle des boulangers lui donne un certain intérêt. Et les feuilles en vélin et en carton complètent le tout. Si vous voulez voir comment j’ai créé la carte du début à la fin, s’il vous plaît vérifier la vidéo
I started with a piece of 8-1/2 x 3-1/2 Early Espresso cardstock. I added a 4-3/4 x 3-1/2 flap, scored at 1/2 inch at the 4-3/4 side at each piece and glued them on each end of the 81/2 x 3/1/2 cardstock forming a gatefold.
I then added a coordinating piece of cardstock 1/4 inch smaller and DSP another 1/4 inch smaller.
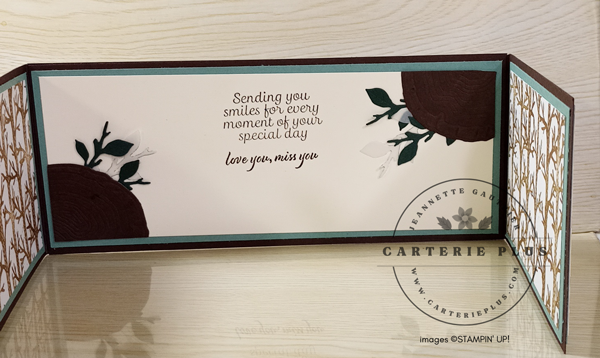
The focal point is created with the tree rings and a piece of card stock with the sentiment stamped in the bottom right corner. I used the new trio punch to create the fancy corners and inked the edges to make it pop. Adding the bakers twine gives it some interest. And the leaves in vellum and cardstock complete it all. If you want to see how I created the card from start to finish, please check out the video.
Maintenant allez voir les projets des autres démos talentueuse. Mais avant de quitter, prière me laisser une petite commentaire et me dire si tu aimer ce projet et si tu vas l’essayer.
Voici une liste des matériels utilisé pour la réalisation de ce projet
Product List  |


 Designer Series Paper")


")
")